This is my blog of beauty. You can find my lists of products here and where you can get them from. You can also find my screen shots here, starting from my newest makeup tutorials so far. Also, many new and some older makeup tutorials will be posted on here as well. I hope you enjoy! =D
I haven't been on my blog in some time. Now, I'm back, and I promise to keep you all updated with exciting news on my upcoming tutorials, and I'll be posting up new makeup tutorials as well. I may not be on all the time, but that doesn't mean I won't be posting up new tutorials and such.
Requests are being taken as well. If you want to learn a certain look, please send me a message on the following sites, and I'll be sure to get back to you as soon as possible:
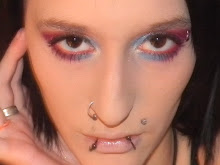
This is not a how to video, even though I was supposed to make one for this piercing, I never got around to it, and my laptop shot to hell for the third time. I do explain in the video how to pierce your labret using the proper tools and the aftercare. Once again, I recommend going to a pro for any piercing, but I've been doing piercings for many, many years. So I know what I'm doing to where I won't screw up my face. This piercing can also take up to 6-8 weeks to heal. Everyone's body is different and it could either take longer, or less time.
MY AFTERCARE DIRECTIONS FOR YOU: NEVER use any kind of soap. Hand soap, shampoo, ext. because you will end up with soap residue inside of the puncture wound, which can cause infection if not completely washed out. I recommend using a sea salt and warm water treatment or a Listerine with antiseptic in it to clean out the piercing. When using the sea salt treatment, leave on puncture wound for about a minute, then rinse until completely rinsed off. I recommend doing the same for the Listerine treatment as well.
2011 is almost over. So why not have fun these last few hours, and wear a little bit a sparkle and glam? This tutorial will show you how to create a fun New Years look. This look is fun, and is perfect for any New Years get together. I hope you enjoy this tutorial, and good luck! =D
This tutorial is much different from my others. This is a speed tutorial. I had to make it this way, or else it would of been like 20 minutes long. Lmao! I hope you enjoy this tutorial, and good luck! =D
This tutorial will show you how to create a split lip. This wound doesn't just have to be on the lip, but anywhere else you want scrapes and scratches. I hope you enjoy this tutorial, and good luck! =D
I remember the night after filming this tutorial. I walked outside into my living room where my roommate and all of his friends were, and they all thought that my boyfriend beat the hell out of me. Lmfao! At first, we played along, but then they started getting pissed off because they actually thought it happened. So I had to take it off to prove to them it was just makeup. It was one of the funniest moments ever.
After I took it off, my roommate Dylan said it was cool how I made it looked like I whipped some of the blood off my face like I was really hurt.
God, I love how creative I can get with this stuff. xD